colour vs substrate colour
preservation of the colour scheme of photos when changing the substrate
When we change the printing substrate, the colour changes. It is obvious. Most often we hear that the total change in colour was related to the change in the substrate. And here we have a bone of contention because within certain limits of the reason we are able to obtain a far-reaching colour mapping between substrates without the use of a white underprint. Fact that it’s not trivial, even far from simple, is no excuse.
The task was clear: get the colour of the photo printed in the middle of the book (Arctic Munken Lynx 150g) on newsprint (Ecco Book 70g). The difference in parameters is striking: white (CIE) 116 vs. 75 and opacity 97 vs 93. So one is neutral white and the other is creamy. In the past, I printed a spread, where half were on Lynx and the other on G-Print (uncoated vs coated matte) and if we did not look up to the light it was virtually unnoticeable, but here is another level: white!
It would seem that the change only applies to the yellow channel. Well, no. First of all, the yellow channel may also contain substantive information in building the image. Secondly, lack of it changes the saturation of other colours, we also have other coatings… Usually the modification often needs to be carried out for CMY channels. Black begins its participation (in this case) in building the image much later, so we can omit it.
In a nutshell, the operations were as follows: the main modification was in the yellow channel keeping the point (0,0), the CM channels were modified separately, while the changes decreased with the coating and around 50-60% of the input image was built unchanged. It would seem that TAC (Total Area Coverage) should be less linear, no! Due to the lower white and the texture of the material, the first percentages were stronger, and only the end of the curve fell slightly. Without such a change, the beginning of the picture would be completely invisible.
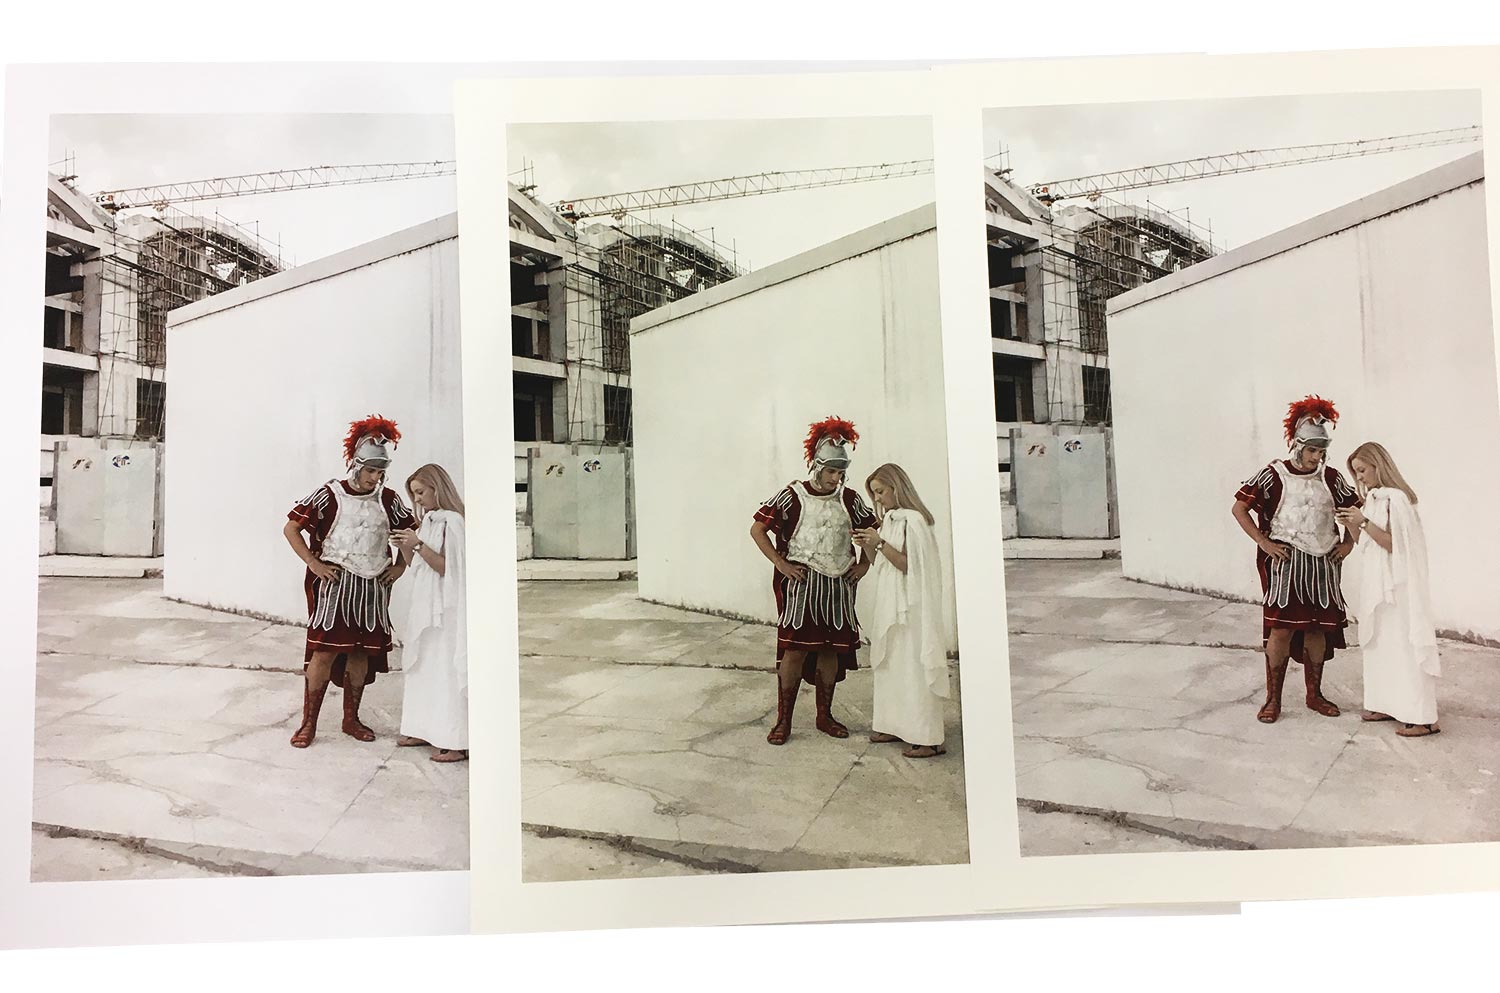
The effect? Evaluate yourself. Below are three pictures, from the left: 1) original printout, 2) the same file – on target paper, 3) modified file on the target substrate. The whole achieved at the third iteration.
machine: HP Indigo 7900,
proofing under offset, AM 150 lpi